|
|
6 ft Black Recycled Rubber Speedbumps
|
Quantity in Basket:
None
Item: 6FTBLKRSB
Price:
$62.25
Shipping Weight: 150.00 pounds
|
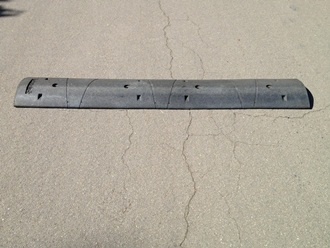
6 ft Economical Black Recycled Rubber Speed Bump with dual bottom channels.
No stripes or cateyes4 mounting holesTough, recycled tire rubber is resistant to weather, salt, moisture, UV, oil, and temperatureWill not warp, chip, or crackEasy, one person installation (instructions included)Installation hardware is available but sold separatelyMade of tough recycled tire rubberConform to surface contourCan be cut with utility knife if necessaryDual bottom channels for drainage, wire or pipe to 3/4 inchDesigned for up to 15 mph Installation hardware and end caps available below
Weight 53 lbs.
Dimensions: 2.625" H x 12" W x 6 feet L.
Manufactured in the U.S.A. to keep Americans working.
 Picture shows dual channels under speed bump. Rubber Speed Bump Installation Instructions Picture shows dual channels under speed bump. Rubber Speed Bump Installation Instructions
Leave 1"-3" between speed bumps for drainage and expansion (can be cut with a utility knife if necessary). For 4-10 trips per day with heavy trucks (i.e. garbage trucks) or an incline (i.e. parking garage), install using both adhesive and hardware. Not designed for more than 10 trucks per day or for speeds over 15 mph. Sweepers must raise brushes before driving over speed bumps. Remove speed bumps when snowplows are in use.
Mounting Rubber Speed Bumps on Asphalt or Gravel:
1. Drill 1/2" diameter pilot holes through asphalt or to depth of 3".
2. Clean installation area.
3. Put rubber speed bump in place. Put washers in place.
4. Start asphalt rebar spikes before completely setting any individual rebar spike.
Mounting Rubber Speed Bumps on Concrete:
1. Drill 3/4" holes, 2" deep and insert lag shield (threaded end goes in first). For maximum expansion, the shield should protrude slightly above concrete surface before setting.
2. Clean installation area.
3. Put rubber speed bump in place. Put washers in place.
4. Insert lag screw starting all lags before tightening any. Tighten with wrench until firm resistance is felt.
Mounting Rubber Speed Bumps with Adhesive:
1. Use 10 ounces of construction grade adhesive such as PL Premium Polyurethane or a 2-tube epoxy such as Simpson ET-22. These products can be bought from your local hardware store.
2. Put rubber speed bump in place. Mark perimeter and drill holes.
3. Brush holes and blow out debris. Clean and dry installation area to adhesive directions.
4. Mix enough epoxy for one installation (if using a 2-tube epoxy) or use a 10 oz. tube of PL Premium.
5. Fill the holes to 2" from top with adhesive.
6. Apply adhesive to bottom of speed bump. Set in place.
7. Install washers and hardware (see instructions above).
8. Allow setting and curing time according to adhesive directions.Please note if you remove speed bump installed with adhesive, you are likely to tear the speed bump or the surface.
|
|